
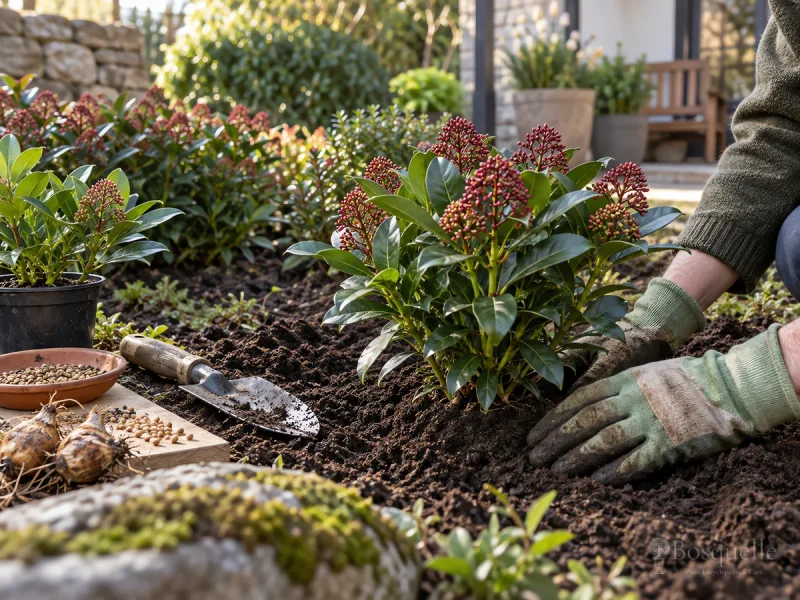
Plant Japanese skimmia in spring or fall, at the same depth as the pot. Set it where the soil stays moist and drains.

Plant in spring or fall, at the same depth as the pot
| Factor | Recommended | Avoid |
|---|---|---|
| When | Spring or fall, while the soil is moist and not frozen | Do not plant into frozen or waterlogged ground |
| Depth | Set the top of the root ball even with the soil | Do not bury the stem, and do not perch the ball high and dry |
| Hole | A hole a little wider than the pot, with compost mixed into the backfill | Do not drop it into a wet sump |
| After | Water it in, then keep the soil evenly moist while it roots | Do not let the new root ball dry in the first weeks |
Japanese skimmia ships in a pot, so you can plant it whenever the soil is workable. Spring and fall are the easy windows, because the ground is already moist. Dig a hole a little wider than the root ball and no deeper. Set the top of the ball even with the soil, backfill with the soil you dug plus some compost, and water it in. [1] [2]
- Choose a shady bed that is not a puddle. Shade and even moisture after planting are on How to Grow Japanese Skimmia.
- Soak the pot, then slide the plant out. Tease circling roots so they can leave the ball.
- Dig a hole a little wider than the pot. Mix compost into the backfill. Do not bury the stem. [3]
- Set the top of the root ball even with the soil. Backfill, firm gently, and water until the hole settles.
When should I plant Japanese skimmia?
Spring or fall, while the soil is moist and not frozen. You can plant a container shrub in summer if you water it through dry weeks.
Leave 3 to 5 feet, and keep mulch off the stems
Leave about 3 to 5 feet beside a landscape plant so the mound can fill. A hedge can sit a little tighter, still with room for air. Spread 2 to 3 inches of compost or shredded bark over the root zone, and leave a bare circle at the stems so the crown does not rot. [4]
- Measure 3 to 5 feet from the next shrub, more if you want a specimen with open sides.
- Mulch the root zone. Keep the mulch off the stems.
- Water through the first dry spells so the new roots do not shrink back.
How far apart do I plant Japanese skimmia?
Leave about 3 to 5 feet for a mound. A hedge can sit closer, still with room for air around the leaves.
A winter pot is only a short stay
Garden centers sell small plants in berry for a winter pot or window box. Use a pot only a little larger than the nursery pot, with a draining mix that holds water. Keep it in shade, and water it through dry winter weeks. After the display, plant it in the ground at the same depth. A forced berry pot that sat hot and dry indoors often sulks; give it shade and even moisture, and wait.
- Choose a pot with a hole, only 1 to 2 inches wider than the nursery pot.
- Use a draining mix that still holds water. Do not pack it in ericaceous mix as if it were a rhododendron.
- Keep the pot in shade, water it, then plant it out in spring or fall.
Set the root ball even with the soil, water it in, and leave 3 to 5 feet. Keep mulch off the stems.
FAQ
Can I plant a berry pot from the store?
Yes, after the winter display. Plant it at the same depth as the pot, in shade. A plant that was forced indoors may sit still for a season.
Can I plant it in summer?
Yes, if the soil is not baked dry or waterlogged. Water it through dry weeks until the roots hold.
Related guides

Recommended plants

References
- [1] Royal Horticultural Society -
https://www.rhs.org.uk/plants/skimmia/growing-guide - [2] BBC Gardeners' World -
https://www.gardenersworld.com/how-to/grow-plants/how-to-grow-skimmia/ - [3] North Carolina Extension -
https://plants.ces.ncsu.edu/plants/skimmia-japonica/ - [4] Oregon State University -
https://landscapeplants.oregonstate.edu/plants/skimmia-japonica
This note is part of Skimmia Guides.
More planting notes by plant are gathered in Planting Guides.
Updated: Reviewed by Bosquelle Editors